
Dog Hiking First Aid:
Injuries, Paw Care & Emergency Rescue
Paw pad injuries, sprains, cuts, and emergency carries—here's how to handle dog hiking first aid on the trail. Practical, vet-informed steps for hiking with dog safety.
No one wants to think about it, but sometimes, the trail wins.
You can check the weather, map out the perfect route, and watch for snakes all day—but that doesn’t change the fact that nature is unpredictable. A sharp rock can slice a paw pad, a hidden hole can twist a leg, or your dog might just hit a wall of exhaustion halfway up a mountain.
I remember the first time my Golden Retriever, Max, stepped on a piece of jagged flint. He let out a sharp yelp, limped for three steps, and then tried to keep going. He had a deep cut on his pad, and we were 3 miles from the car. That day, I realized just how important it is to know dog hiking first aid.
The good news? You don’t need to be an emergency vet tech to handle the most common trail injuries. You just need a well-stocked kit, a cool head, and the knowledge of what to do before you can get to professional help.
Quick note: I’m a dog owner, not a vet. This guide pulls together practical tips from veterinary professionals and my own battlefield experiences on the trail. For anything severe, always get to a licensed veterinarian as fast as possible.
This is part of our hiking with dog safety series. For the big-picture overview of trail preparation and etiquette, start with the main guide here: The Ultimate Guide to Hiking with Your Dog.
What's in This Guide
In this guide, I’ll walk you through:
The essential dog hiking first aid kit
Paw pad injuries — how to field-dress them
Sprains, strains, and muscle injuries
Cuts, scrapes, and puncture wounds
Heatstroke and dehydration emergencies
How to carry a large dog out of the wilderness
Emergency evacuation protocol
Part 1
The Essential Dog Hiking First Aid Kit
The most important thing about a dog hiking first aid kit is not what's in it, but that it actually goes with you. I keep a small, dedicated pouch in my hiking backpack that is onlyfor Max. It's refilled immediately after every trip.
What's in my kit (and what you should have too):
Item | Why I Pack It |
|---|---|
Gauze pads & Vet Wrap | For stopping bleeding and securing bandages. Vet wrap is self-adhesive and doesn't stick to fur. |
Medical Tape | To secure bandages and improvised splints. |
Saline Wound Wash | Flushes out dirt and debris without stinging. |
Antiseptic Wipes / Povidone-Iodine | For disinfecting cuts and scrapes before bandaging. |
Tick Remover & Tweezers | To safely extract ticks and splinters. |
Styptic Powder | Stops bleeding immediately if they crack a nail or have a small cut. |
Benadryl (Diphenhydramine) | For insect stings or mild allergic reactions. Note:Ask your vet for the exact weight-based dosage first! |
Elastic Bandage / Ace Wrap | To support a strained joint or hold an ice pack |
Molefoam / Paw Pads | A thin piece of padding you can tape over a cut pad to allow them to walk out. |
Instant Cold Pack | For swelling, sprains, and insect stings. |
Small Scissors | For cutting gauze, tape, and fur around a wound. |
Emergency Blanket (Mylar) | To keep a dog in shock warm while you figure out next steps. |
The bottom line: You don’t need a vet-grade kit—you need a kit that’s small enough to actually carry. Build it once, refill it after every hike, and you’ll never be caught unprepared. This is the foundation of hiking with dog safety.
Quick Answer: A dog hiking first aid kit should include gauze pads, vet wrap, medical tape, saline wound wash, antiseptic wipes, a tick remover, styptic powder, Benadryl (with vet-approved dosage), an elastic bandage, molefoam, an instant cold pack, small scissors, and an emergency blanket. The most important thing is that it actually goes with you—every hike, every time.
Part 2
Paw Pad Injuries: How to Field-Dress Them
Paw pads are the most vulnerable part of a hiking dog. They take a pounding on rocks, hot ground, and sharp debris. This is the #1 injury I see on trails—and the most common reason dog hiking first aid gets used.
The "7-Second" Rule: Just like checking pavement for heat, check the terrain on the trail. If you wouldn't walk barefoot on those sharp rocks, neither should your dog.
If Your Dog Cuts a Pad:
-
Stop the bleeding. Apply direct pressure with a clean gauze pad for a couple of minutes.
-
Clean it. Flush the wound thoroughly with saline or clean bottled water to remove dirt.
-
Bandage it. Wrap it in gauze, then secure with vet wrap. Make sure it’s snug but not cutting off circulation.
-
Use the “Molefoam trick.” If you have to walk out, cut a piece of Molefoam (or a similar foam padding) slightly larger than the pad, and tape it over the bandage. This gives them a flat, comfortable surface to step on.
-
Keep it dry and clean. Use a bootie or a sock to keep dirt out, and don’t let them lick the bandage off.
If the bleeding won’t stop: Apply styptic powder if you have it. If bleeding continues for more than 5–10 minutes—or if you can see the underlying tissue or bone—this is a severe emergency. Carry your dog out immediately and head to a vet.
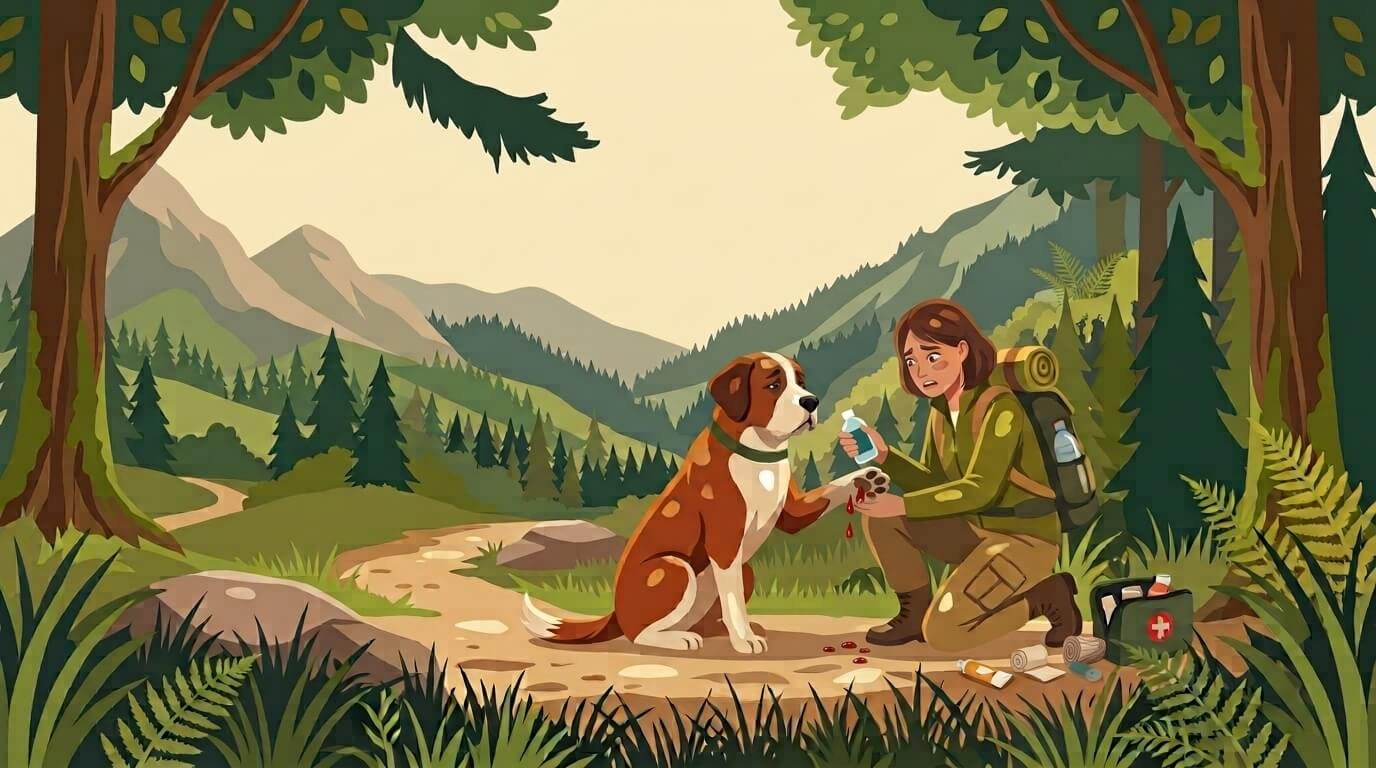
Quick Answer: For a cut paw pad, stop the bleeding with gauze, flush with saline, bandage with vet wrap, and add a Molefoam pad for walking out. If bleeding won’t stop after 5–10 minutes, or you can see tissue or bone, carry your dog out and go straight to a vet. This is one of the most common dog hiking first aid situations—so practice it at home before you need it.
Part 3
Sprains, Strains, and Muscle Injuries
Hiking with dogs safety means preparing for uneven terrain. Just like humans, dogs can step wrong and twist an ankle (actually, it's usually the carpus or wrist).
Signs of a sprain:
Lifting a leg while moving (intermittent limping).
Refusing to put weight on a leg.
Whining when stretching or walking.
Swelling around the joint.
What to do:
-
Stop the hike immediately. Do not let them “walk it off.” Walking on a sprain makes the injury much worse.
-
Rest and cool: If it’s a hot day, use a cool pack (or a bandana soaked in a cold stream) against the joint to reduce swelling.
-
Wrap for support: Use an elastic bandage to lightly support the joint and limit movement.
-
Carry or walk out gently: If it’s a mild sprain, they can usually walk very slowly back. If they show any sign of severe pain, carry them.
Quick Answer: If your dog shows signs of a sprain — limping, refusing to put weight on a leg, or swelling around a joint — stop the hike immediately. Don’t let them “walk it off.” Rest the joint, apply a cool pack if it’s hot, wrap lightly with an elastic bandage for support, and carry them out if the pain is severe. This is one of the most common dog hiking first aid situations — so know the signs before you need them.
Part 4
Cuts, Scrapes, and Puncture Wounds
Dogs are built to plow through brush, which means they are going to get scratched. A superficial scrape is nothing to worry about. A puncture wound is a different story.
For Scrapes and Minor Cuts:
Clean with saline wash.
If the area has dirt or debris in it, do your best to flush it out.
If it’s just a surface scrape, let it air out and keep the dog moving so it stays clean.
For Puncture Wounds (like stepping on a stick):
Do not try to dig around in the wound. Puncture wounds introduce deep bacteria.
Clean the surface.
Head straight to the vet. Puncture wounds can look tiny on the surface but heal over bacteria inside, leading to severe infections and abscesses if not properly treated.
Quick Answer: Hiking with dogs safety means accepting that dogs are built to plow through brush — which means they’re going to get scratched. A superficial scrape is nothing to worry about. A puncture wound is a different story.
Part 5
Heatstroke and Dehydration: The Silent Killers
We talked about summer heat in the flat-faced dog guide, but it applies to all dogs on a strenuous hike. Hiking with dogs safety means understanding that heatstroke can affect any dog on a strenuous hike — not just flat-faced breeds.
Early Warning Signs:
Heavy, frantic panting that doesn’t stop.
Thick, sticky saliva.
Bright red or purple gums.
Glassy eyes and unresponsiveness.
First Aid for Heatstroke:
Stop and move to shade immediately.
DO NOT use ice water. Use cool (room temp) water poured over their paws, belly, and armpits.
Use a fan if you have one, or just fan them with your hands to create airflow.
Offer water: Only give them small sips if they are fully conscious and can swallow on their own.
Rush to the vet! Heatstroke causes organ failure. Even if they seem to recover after cooling off, internal damage may already have occurred.
Quick Answer: Heatstroke in dogs shows up as heavy panting, thick saliva, bright red gums, and unresponsiveness. If you suspect it, stop immediately, move to shade, pour cool (NOT ice-cold) water over their paws, belly, and armpits, fan them, and get to a vet right away — even if they seem to recover. Heatstroke can cause organ failure.
Part 6
How to Carry a Large Dog Out of the Wilderness
This is the nightmare scenario. A 70lb Golden Retriever tears a ligament and cannot walk, and you are 4 miles from the trailhead.
Please don't try to pick up a heavy dog and "cradle" them. You will both fall and get hurt.
The "Jacket Sling" Technique:
-
Take off your heavy hiking jacket or long-sleeved shirt.
-
Zip it up.
-
Thread your two trekking poles (or two strong branches) through the sleeves of the jacket.
-
Your jacket now becomes a makeshift stretcher.
-
Gently roll your dog onto the jacket, with your trekking poles acting as the rigid handles.
-
Have a partner lift one end, and you lift the other (use your legs, not your back!).
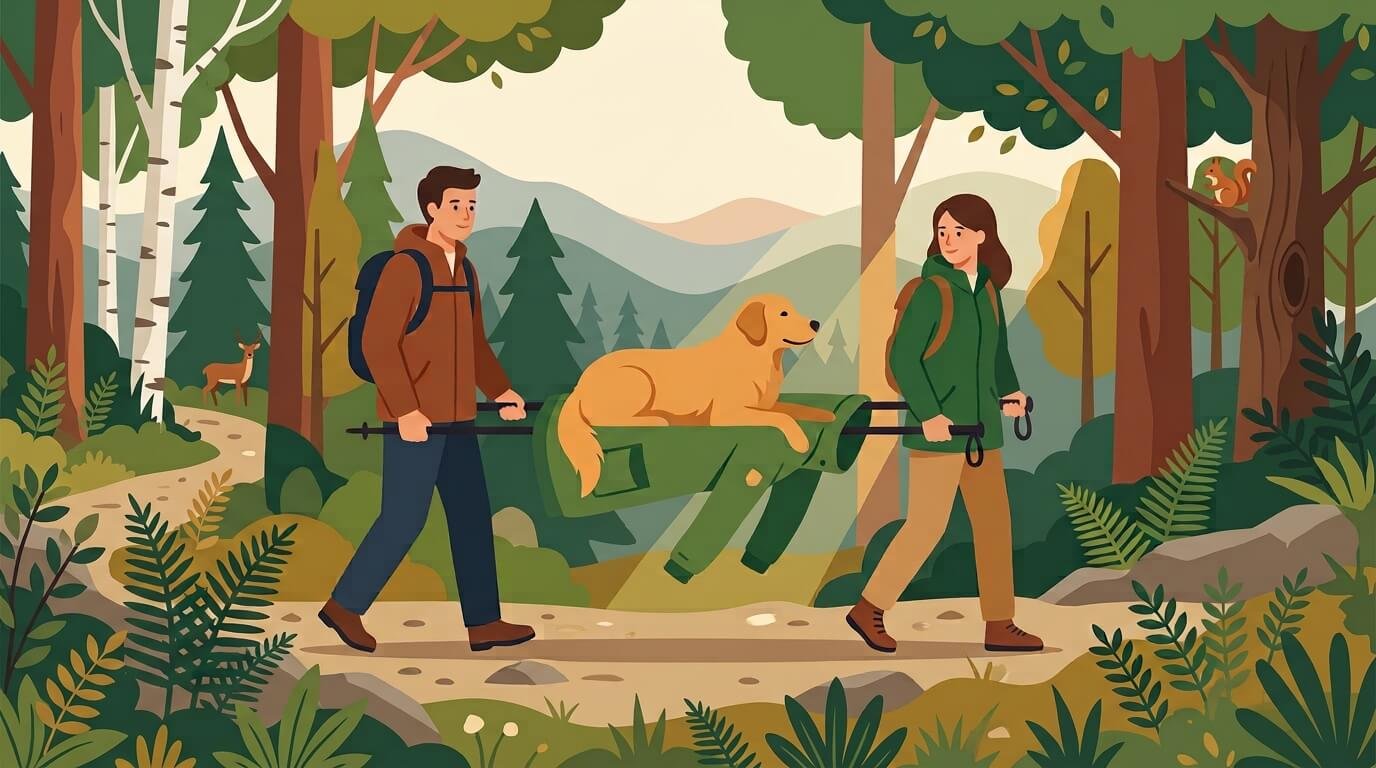
Quick Answer: If a large dog can’t walk out of the wilderness, don’t try to carry them in your arms. Use the “Jacket Sling” technique instead: thread two trekking poles through the sleeves of a zipped-up jacket to make a makeshift stretcher. Roll your dog onto the jacket and lift with a partner — using your legs, not your back.
Part 7
The "Can We Continue?" Assessment
Sometimes, the injury is small, but the situation is bad. Just because your dog can limp doesn't mean they should. This is the hardest part of dog hiking first aid—and the most important.
When to turn back immediately (no matter how close the summit is):
□ The cut or injury is bleeding heavily.
□ They are limping without putting any weight on the leg.
□ They are refusing to eat or drink.
□ They are panting excessively in the shade.
□ They are collapsing or stumbling.
□ You are exhausted or injured. If you can’t safely help them, you can’t safely continue.
When you get back home:
-
Pull all ticks immediately and apply antiseptic.
-
Do a full-body scan for hidden cuts and abrasions.
-
Photograph any wound—it helps you (and your vet) track changes.
-
Keep them in a cool, quiet room to rest.
-
Call your vet the same day for any injury involving visible blood, limping, or changes in behavior.
Quick Answer: Turn back immediately if your dog is bleeding heavily, not putting weight on a leg, refusing food or water, panting in the shade, collapsing, or if a storm is rolling in. When you get home, check for ticks, scan for hidden cuts, photograph any wound, let them rest, and call your vet the same day for anything serious.
FAQ: Hiking First Aid for Dogs
Do not try to cut or suck the wound—and do not apply ice or a tourniquet. Remove their collar or harness immediately (swelling can choke them), keep them as still as possible (a fast heart rate spreads venom faster), and carry them to the car. Drive to the nearest emergency vet and call ahead so they can prepare antivenom if they carry it.
It depends on the injury. A small cut or scrape? They can often walk out slowly with a bandage and a Molefoam pad. A deep cut, visible tissue, or a dog that won't put weight on the leg? Carry them out. Never let a dog "tough it out" on an injured paw—it can turn a minor injury into a major one.
Yes, but gently. Flush the wound with saline or clean bottled water to remove dirt and debris. Don't scrub—scrubbing can cause more damage. If the wound is deep, bleeding heavily, or you can see tissue or bone, skip the cleaning and get to a vet as fast as possible.
Carry them out if they're limping without putting weight on the leg, bleeding heavily, collapsing, or refusing to move. If they can walk slowly but are clearly in pain, consider a slow walk-out with frequent breaks. When in doubt, carry them—your dog can't tell you how bad it hurts.
No. Hydrogen peroxide damages healthy tissue and slows healing. Use saline wound wash or clean bottled water instead. Save the peroxide for your own scrapes.
Start with a muzzle or a soft cloth around the snout—pain makes even the gentlest dog snap. Have a second person hold your dog if possible. If you can't safely bandage the paw, wrap it loosely with gauze to slow bleeding, then carry your dog out.
No. Never give your dog human painkillers—including ibuprofen, acetaminophen, or aspirin. Many are toxic to dogs and can cause organ failure. Only give pain medication prescribed by your vet for your dog's specific weight and condition.
Start with our main guide to hiking with dog safety, and explore the Hiking & Outdoor Hazards hub for more on gear, heat safety, trail etiquette, and emergency prep.
Sources & Further Reading
This guide combines my own trail experience with these trusted sources:
-
American Veterinary Medical Association (AVMA) — First aid for pets, injuries, and wounds
-
ASPCA Animal Poison Control — Emergency first aid and poison control
-
American Red Cross — Pet first aid and CPR
-
Leave No Trace Center for Outdoor Ethics — Safe backcountry travel
-
World Small Animal Veterinary Association (WSAVA) — Global veterinary guidelines for small animal care
Final Thoughts
Nobody wants their adventure to end in an injury. But the best hikers aren’t the ones who never fall—they’re the ones who know how to get back up safely.
By carrying a solid first aid kit, understanding how to stabilize your dog, and knowing when to turn around, you turn a bad day on the trail into a manageable one—instead of an emergency.
Your dog trusts you to take care of them in the woods. Be the hero they think you are. That’s what hiking with dog safety is really about. Stay safe out there! 🐾
What's ahead in this series:
Hiking With Dog Safety: The Ultimate Guide to Prep, Gear & Trail Etiquette
Discover essential hiking with dog safety tips! From pre-hike prep and must-have gear to trail etiquette and wildlife hazards, this guide keeps your pup safe.
Dangerous Wildlife & Plants on Trails: What Every Dog Owner Must Know
Snakes, bears, toxic mushrooms, and poison oak — learn how to protect your dog from dangerous wildlife and plants on the trail. Practical, vet-informed tips.
Trail Hazards for Dogs: Risky Terrain, Steep Slopes & How to Prevent Falls
Steep slopes, loose scree, and uneven terrain are the most common trail hazards for dogs. Here’s how to prevent falls, spot risky ground, and keep your dog safe.
Dog Hiking Endurance: Preventing Trail Fatigue and Getting Lost
Learn how to prevent dog hiking endurance issues! Spot the signs of fatigue, build stamina, and use vital tips to stop your dog from getting lost.
Disclaimer: I’m a dog owner, not a veterinarian or a wildlife expert. This content is for informational purposes only and does not replace professional veterinary or safety advice. Always consult a qualified veterinarian about your dog’s specific needs before heading out.