Dog Curb Training: How to Train Your Dog
to Wait at the Curb and Cross Roads Safely
Stop, wait, cross — a simple skill that keeps your dog safe.
Learning to teach dog to cross road safely is one of the most valuable skills you can build with your pet. That’s why dog curb training is such an essential skill for everyday walks. Teaching your dog to stop, wait, and cross the road with you gives you another layer of control when you need it most.
The goal isn’t to teach your dog that a curb magically makes a street safe. It’s to build a reliable routine: stop → wait → check → cross together.
The American Kennel Club (AKC) includes stopping at a corner, waiting, and crossing a street under control as part of its Urban Canine Good Citizen skills.
This guide will show you how to build that behavior gradually, starting at home and eventually practicing at real intersections.
*Before you start: For a broader look at leash control, road hazards, and everyday walking habits, see our Complete Dog Walking Safety Guide. If you regularly walk after dark, our Night Dog Walking Safety guide covers visibility, traffic, and nighttime hazards.*
*For more general walking advice, see our Complete Dog Walking Safety Guide
Part 1
Start With the Basics — "Sit" and the "Dog Wait Command"
Before asking your dog to wait beside a real road, make sure they understand the basic behaviors in a calm, low-risk environment.
You don't want the first lesson to happen next to moving traffic.
Teach "Sit" First
A reliable sit gives you a simple way to ask your dog to stop moving.
If your dog already knows “sit,” practice it in different rooms and locations so the behavior isn’t limited to your living room.
Start with:
-
Ask your dog to sit.
-
When they sit, immediately mark the behavior with a word such as “Yes!” and give a reward.
-
Release your dog with a consistent word such as “Okay” or “Let’s go.”
-
Repeat several times.
-
Gradually practice in slightly more distracting environments.
Keep the sessions short. A few minutes of successful training is usually more useful than one long session in which your dog becomes frustrated or distracted.
Teach the "Wait" Cue — A Reliable Dog Wait Command
“Wait” and “stay” don’t necessarily have to mean the same thing.
The AKC describes “wait” as a temporary hold, while “stay” generally means remaining in a particular position until released.
For curb training, the dog wait command is especially useful because you want your dog to pause before moving forward—not hold a position indefinitely.
Try this indoors:
-
Ask your dog to sit.
-
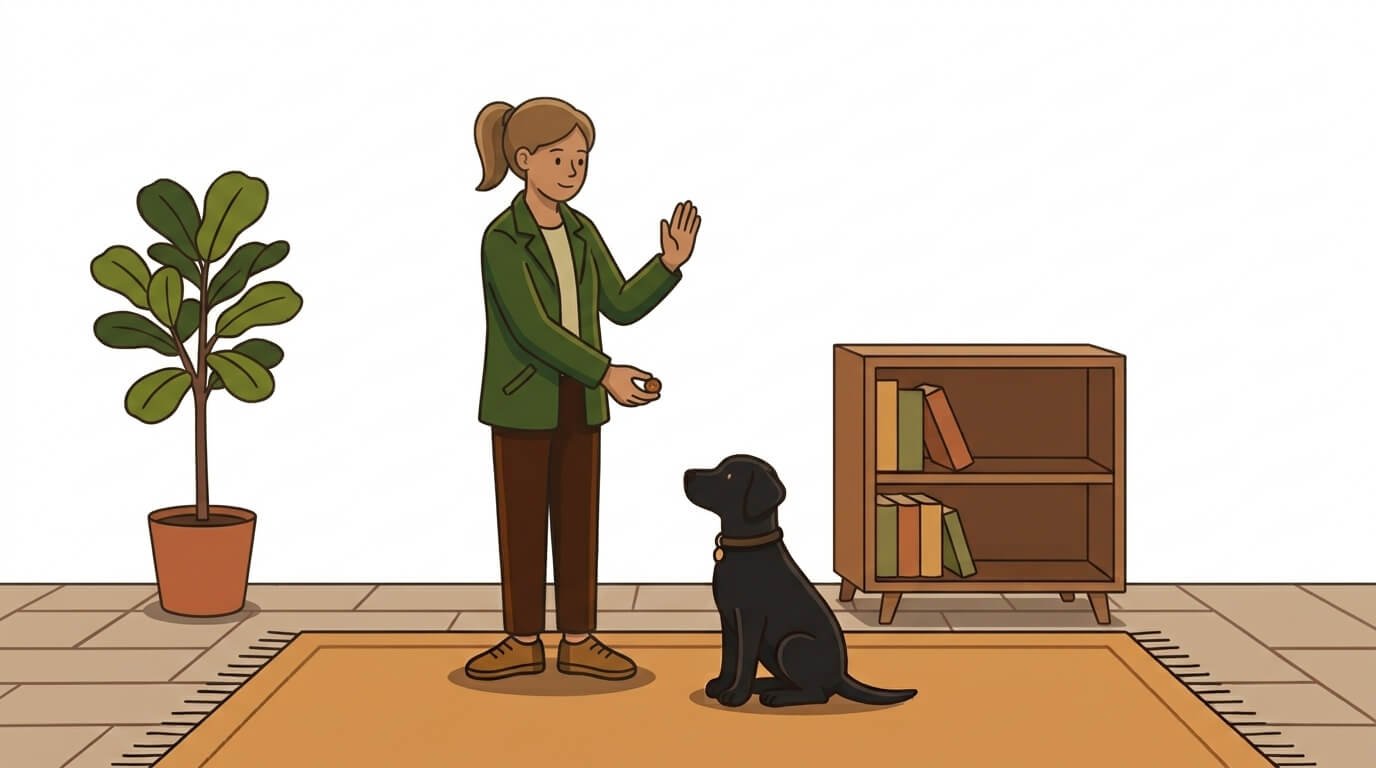
Say “Wait.”
-
Pause for one second.
-
If your dog stays in place, say “Yes!” and reward.
-
Give your release cue, such as “Okay.”
-
Gradually increase the waiting time.
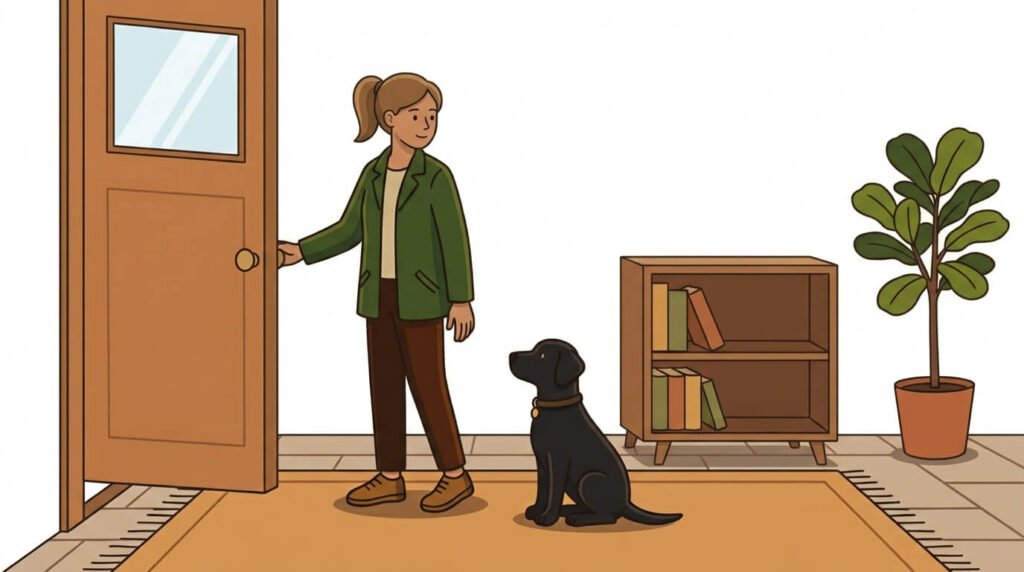
Once your dog understands the idea, practice standing up, taking a step away, and returning to reward them.
Don’t rush the process. If your dog repeatedly gets up before you release them, make the exercise easier.
Build the Behavior Before Adding the Street
Think of curb training as a progression:
Quiet room → doorway → driveway → quiet sidewalk → quiet intersection → busier intersection
Each new environment adds another challenge.
If your dog struggles at a new location, that’s not failure. It simply means you moved to the next difficulty level too quickly.
Quick Answer: Before working on dog curb training, master two basic commands at home: “sit” and “wait.” A reliable sit gives you a way to stop your dog’s movement. A reliable wait teaches them to pause before moving forward — exactly what you need at a curb.
Part 2
Practice at the Curb — Step by Step
Dog curb training works best step by step. Once your dog reliably responds to "sit" and "wait" in low-distraction settings, you can begin practicing near a curb. This step-by-step approach is the most effective way to teach dog to cross road without overwhelming them.
For the first few sessions, choose a quiet location away from busy traffic.
Keep your dog on a secure leash, and don’t practice directly beside fast-moving traffic until the behavior is well established.
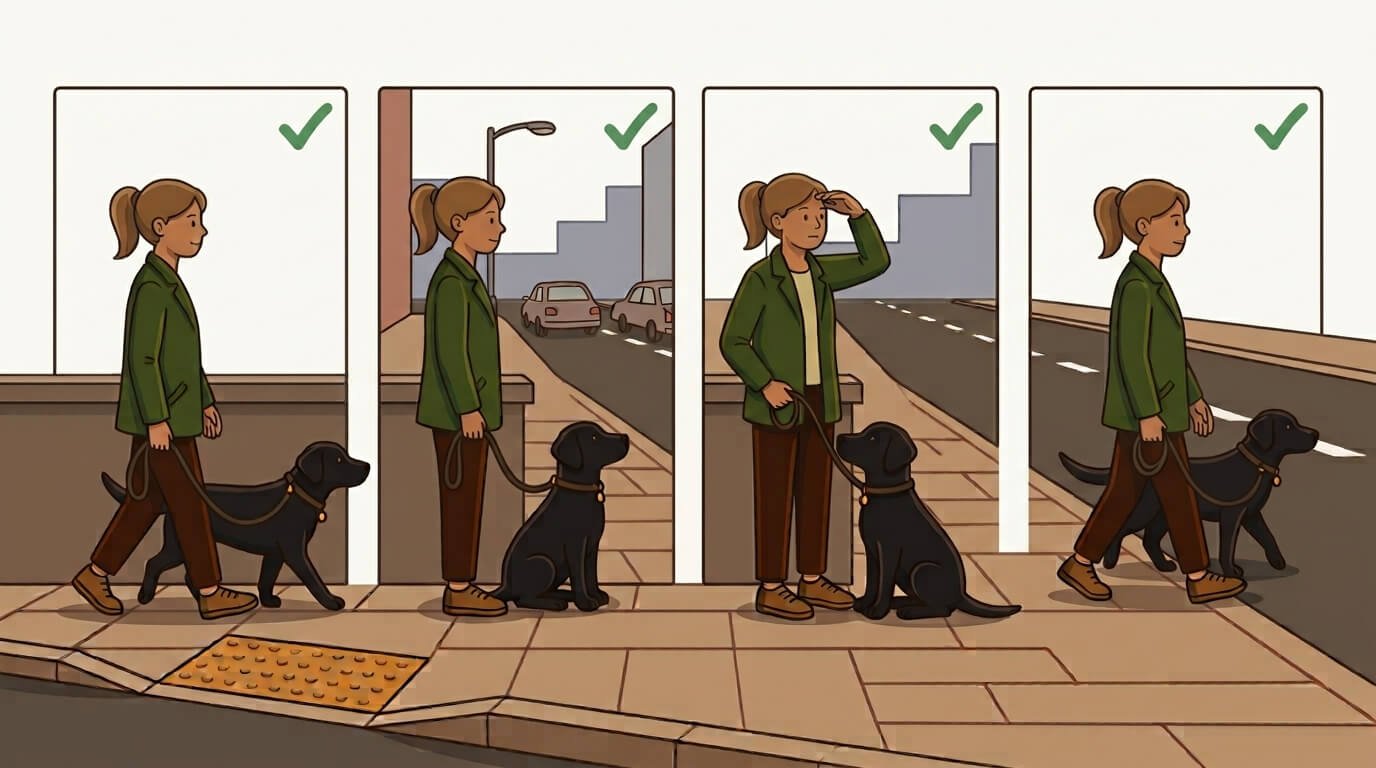
Walk toward the curb at your normal pace.
A few feet before reaching the street, slow down.
You want your dog to begin learning that approaching a curb means something different is about to happen.
Stop at the curb yourself.
Your dog may naturally stop with you. If they continue forward, use your leash to prevent them from stepping into the street and calmly reposition them.
Avoid jerking the leash.
Say:
"Wait."
Use the same cue every time.
You can also use a consistent hand signal, such as an open palm.
Your dog doesn't necessarily need to sit perfectly. The important behavior is not moving forward into the street without your release cue.
At first, reward almost immediately.
If your dog waits for one or two seconds, mark the behavior and reward.
Then release:
"Let's go."
Walk forward together.
As your dog becomes more reliable, gradually increase:
-
Waiting time
-
Distance from the curb
-
Environmental distractions
-
Distance you walk before crossing
-
Variety of locations
Don’t increase everything at once.
The AKC recommends building behaviors gradually and adding distractions only after the dog understands the basic behavior.
Teach a Consistent "Cross" Routine
You can also introduce a separate cue such as “Cross” or “Let’s cross.”
The exact word doesn’t matter nearly as much as consistency.
A useful routine is:
Stop → Wait → Look → Cross
For example:
-
“Wait.”
-
Check the road.
-
“Let’s cross.”
-
Walk across together.
The cue should mean move with me now, not “run across the street.”
Keep your dog beside you and maintain control of the leash throughout the crossing.
Don't Teach Your Dog to Decide When It's Safe
One important point: you’re teaching your dog to wait for you, not to judge traffic.
Even a very well-trained dog cannot reliably understand vehicle speed, driver behavior, or whether a car is going to turn.
The final decision should always come from you.
Quick Answer: Practice dog curb training step by step: approach the curb, stop, ask for “wait,” reward the wait, and gradually add distractions. Once your dog reliably waits, introduce a separate “cross” cue. The goal is to teach your dog to wait for you — not to judge traffic on their own.
Part 3
Add Distractions Gradually
Once your dog has mastered the basic dog curb training, the next challenge is adding distractions.
A dog that waits perfectly in your driveway may completely forget the behavior when a squirrel runs across the sidewalk.
That's normal.
Dogs don't automatically generalize a behavior from one environment to another.
Your job is to gradually teach your dog that "wait" still means wait when something interesting is happening.
Start With Easy Distractions
Try practicing while:
Someone walks past
A bicycle passes at a distance
Another person talks nearby
A toy is visible
Your dog hears a familiar sound
Reward your dog for staying focused on you.
Then Increase the Difficulty
Once your dog can handle mild distractions, move toward:
-
Busier sidewalks
-
More pedestrians
-
Other dogs at a safe distance
-
Bicycles
-
Scooters
-
Traffic noise
-
Parking lots
The key is distance.
If your dog becomes too excited to respond, move farther away from the distraction.
AKC training guidance similarly recommends starting in low-distraction environments and gradually working toward busier settings rather than jumping directly into the most challenging situation. (source)
Choosing the Right Reward
Your dog’s normal kibble may be enough in the living room.
It may not be enough when a squirrel is five feet away.
For difficult training environments, consider using a small amount of a reward your dog finds especially motivating.
The reward should come after the desired behavior.
For example:
“Wait.”
Dog waits.
“Yes!”
Treat.
“Let’s cross.”
Over time, you can reduce how frequently you give food rewards as the behavior becomes more reliable.
Quick Answer: After your dog masters basic dog curb training, add distractions gradually. Start with mild ones (someone walking past, a distant bicycle), then work up to busier settings (crowds, traffic noise, other dogs). If your dog gets too excited, increase the distance from the distraction. Always reward the behavior you want.
Part 4
Handling Sudden Noises and Unexpected Situations
A car horn. A dropped trash can. A sudden shout.
Any of these can startle even a calm dog — and a startled dog might bolt.
That's why dog curb training includes handling sudden noises, not just waiting at curbs. Your calm response is what gets your dog back under control.
Practice Before You Need It
You don’t need to deliberately scare your dog with a real car horn.
Instead, gradually introduce common sounds at a low intensity:
-
Distant traffic
-
Door closing
-
Bicycle bells
-
Construction noise
-
Recorded traffic sounds at low volume
Reward your dog for looking at you and remaining calm.
If your dog becomes frightened, reduce the intensity or increase the distance.
If Your Dog Gets Spooked
If your dog suddenly reacts to a horn or another loud noise:
Keep hold of the leash.
Don’t chase after a frightened dog if they manage to slip away.
Move away from traffic.
Guide your dog toward the sidewalk or another safe area.
Get your dog’s attention.
Use their name or a familiar cue such as “Come” or “Touch.”
Give your dog time to settle.
Don’t immediately force them back into the stressful situation.
If your dog repeatedly panics around traffic or loud noises, consider working with a qualified, reward-based dog trainer.
Give Your Dog a "Behind" Position
Another useful skill is teaching your dog to move behind you when something concerning approaches.
AKC training guidance describes teaching dogs to move behind their handler as one way to create space during potentially uncomfortable encounters.
This can be useful at an intersection if a cyclist, unfamiliar dog, or other distraction suddenly approaches.
Practice the behavior somewhere safe before trying to use it in a real situation.
Keep the Leash Short Without Keeping It Tight
There’s an important difference between short and tight.
A short leash gives you control. A constantly tight leash creates tension and can actually encourage your dog to pull.
Ideally, your dog should be walking close enough that you can quickly bring them to your side, while the leash remains reasonably relaxed.
When approaching:
-
A busy intersection
-
Another dog
-
A driveway
-
A cyclist
-
A narrow sidewalk
Shorten the leash temporarily and bring your dog closer. Once the hazard has passed, give your dog more appropriate walking room.
Quick Answer: If your dog gets spooked by a sudden noise, stay calm, keep hold of the leash, and move away from traffic. Don’t chase a frightened dog. Practice with common sounds at low intensity first, and reward calm behavior. For extra control, teach a “behind” position where your dog moves behind you when something concerning approaches.
Part 5
Generalize the Behavior to Different Curb Types
Dog curb training doesn't stop at one curb. Your dog may learn to wait perfectly at the curb outside your house — then completely forget everything when you take them somewhere new.
Again, this is normal.
Different locations create different levels of distraction.
Practice Different Environments
Once your dog is reliable in a quiet neighborhood, gradually introduce:
Quiet residential street → Busier neighborhood → Shopping area → Parking lot → Busy intersection
Each location should be introduced gradually.
Practice Different Curb Designs
Dogs may encounter:
Standard sidewalk curbs
Curb ramps
Crosswalks
Driveway entrances
Parking lot entrances
Raised crossings
Intersections without traditional sidewalks
Don’t assume that because your dog understands one curb, they automatically understand every type of street crossing.
Use the same basic routine:
Stop → Wait → Check → Cross
Don't Practice Where the Consequence of Failure Is High
Training near a busy highway entrance or complicated intersection isn’t necessary.
You can build the behavior in safer places first.
When you’re eventually working near a real road, the goal isn’t to “test” your dog.
It’s to use a behavior you’ve already trained successfully.
Quick Answer: Once your dog masters dog curb training at home, practice in different environments — quiet streets first, then busier areas, then parking lots and intersections. Different curb designs (ramps, crosswalks, driveways) each need practice too. Always use the same routine: Stop → Wait → Check → Cross.
Part 6
Leash Features Worth Looking For
Real walks don't always go according to plan.
Your dog may see a rabbit. A cyclist may suddenly appear. A car may turn into a driveway while you're waiting to cross.
Here's how to handle some common situations.
You don’t need an expensive leash to have a safe walking setup. Look for practical features such as:
Don't reward the forward movement by allowing your dog to continue.
Instead:
-
Stop.
-
Shorten the leash without jerking it.
-
Bring your dog back to your side.
-
Ask for "wait."
-
Reward calm behavior.
-
Continue only when you are ready.
If this happens frequently, spend more time practicing leash walking away from traffic.
Don't make "sit" the only measure of success.
The important behavior is waiting safely.
Your dog can stand calmly while waiting if that's what they've been trained to do.
If you specifically want an automatic sit, teach that behavior separately and gradually.
Don't punish your dog.
Instead, calmly reset and make the next repetition easier.
For example, if you asked for a 10-second wait and your dog moved after three seconds, go back to a two- or three-second wait.
Build success again.
Increase your distance from the distraction.
A dog that cannot respond to "wait" while watching a squirrel from five feet away may be perfectly capable of responding from 30 feet away.
Training is about finding the level at which your dog can succeed.
Training Progress Timeline
There is no universal timeline for dog training. Some dogs will progress faster, while others need more repetition. Use this as a flexible framework rather than a deadline.
Training Period | Main Goal | What to Practice |
|---|---|---|
Week 1 | Basic commands | Sit, wait, release cue, short calm sessions |
Week 1 | Curb practice | Stop, wait, reward, release in quiet locations |
Week 1 | Add distractions | Pedestrians, bikes, sounds, other dogs at a distance |
Week 1 | Real intersections | Quiet crossings first, then gradually busier locations |
Don’t move to the next stage simply because the calendar says it’s time.
Move forward when your dog is consistently successful at the current level.
And remember: a reliable behavior comes from repetition, not a four-week deadline.
Quick Answer: When dog curb training hits a snag — pulling toward the street, refusing to sit, breaking the wait, or getting distracted — don’t repeat cues or scold. Reset calmly, reward the behavior you want, and if the environment is too challenging, increase the distance or move to a quieter spot. Progress comes from repetition, not a strict timeline.
FAQ: Dog Curb Training
It depends on your dog, but most dogs start understanding the basics in 1–2 weeks of daily practice. Reliable behavior at every curb usually takes 4–6 weeks. Short, consistent sessions work better than long ones.
Go back to basics: practice in a quiet area with no distractions. Use a treat or toy to lure your dog into a sit, reward immediately, then repeat. If your dog is too excited, increase distance from the curb and slowly work closer. Never force or yank the leash.
Yes — high-value treats work best. Reward your dog the moment they stop and sit at the curb. Over time, you can phase out treats and replace them with praise and occasional rewards. The key is consistency.
Teach a "let's go" cue for crossing. Only say it after your dog has stopped, sat, and you've checked for traffic. Cross calmly and confidently, and reward your dog on the other side. Never cross when your dog is pulling or distracted.
Start training in low-distraction areas — your backyard, a quiet sidewalk, or an empty parking lot. Once your dog can focus there, gradually add distractions. If your dog is overwhelmed, shorten the session and end on a positive note. For more, see our Dog Walking Safety Guide.
Ultimate Curb Training Checklist
Before heading out, ask yourself:
□ My dog reliably responds to "sit."
□ My dog understands the "wait" cue.
□ My dog understands a release cue.
□ My dog can wait for several seconds without moving forward.
□ My dog can respond to me when mild distractions are present.
□ My dog stops when I stop at the curb.
□ My dog waits before approaching the street.
□ My dog stays close to me while waiting.
□ My dog waits for my release cue.
□ My dog crosses the road beside me rather than pulling ahead.
□ My dog can wait while pedestrians pass.
□ My dog can wait when bicycles pass nearby.
□ My dog can remain responsive around traffic sounds.
□ My dog can recover from a sudden noise.
□ My dog can focus on me around other dogs.
□ We've practiced on quiet residential streets.
□ We've practiced at different curb types.
□ We've practiced at crosswalks.
□ We've practiced in a new neighborhood.
□ We've practiced in gradually busier areas.
□ My dog is always secured with an appropriate leash near traffic.
□ I don't rely on my dog to decide when it is safe to cross.
□ I don't let my dog approach the road independently.
□ I stay focused rather than using my phone while crossing.
□ I know how to respond if my dog becomes frightened.
□ I can safely move my dog away from an unexpected hazard.
Final Word
Dog curb training isn’t about traffic rules — it’s about building a habit that gives you control when it matters most.
Start quiet. Teach sit, wait, and a release cue. Practice at curbs, add distractions slowly, and don’t rush to busy streets just because your dog nailed it in your driveway.
A dog that waits calmly at the curb is safer around roads. But training works best alongside good leash handling, attentive supervision, and smart crossing decisions.
Stop. Wait. Check. Cross together. That’s the habit to build.
More in This Series
This article is part of our Walking & Road Safety series. If you found this helpful, these guides go deeper into specific situations.
The Complete Dog Walking Safety Guide: Protect Your Pup on Every Walk
Everything you need to know before your next walk — gear, habits, and the most common mistakes to avoid. If you only read one thing, start here.
Night Dog Walking Safety: How to Stay Visible and Avoid Hazards After Dark
Keep your dog safe on nighttime walks. Learn about reflective gear, driver blind spots, wildlife risks, and essential safety tips for night dog walking safety.
Best Leash for Walking Dog: Fixed vs Retractable on Road Walks
Choosing the best leash for walking your dog — fixed-length vs retractable, leash length, harness vs collar, and safety tips for walking near traffic.
Sidewalk Hazards for Dogs: What Every Owner Should Know
Learn about common sidewalk hazards for dogs — hot pavement, glass, chemicals, and uneven surfaces. Keep your dog’s paws safe on every walk.
Disclaimer: This content is for informational purposes only and does not constitute veterinary or professional safety advice. Always consult with a qualified veterinarian or professional dog trainer regarding your dog’s specific needs and safety considerations.